
Easy Headless Wordpress with Nuxt & Netlify
Part 2 covers Vue, Nuxt and a little Tailwind.
Part 3 will deal with deploying with Netlify and adding a build hook to our CMS.
Recently, I was tasked with building the event website for AIGA’s first annual Midwest Design Week.
Last year, I built the site for AIGA Louisville’s Design Week using Gatsby and a handful of markdown files. The content was really only editable by myself or another developer, and that was fine at the time. (I wrote a couple articles about the experience here and here.
This year, however, members from 4 different city chapters were involved and needed to be able to easily add and edit content, so some kind of CMS was required.
The company I work for, Relay Design Co. also got involved as the Creative Sponsor. Because the stacks we use at Relay include both Vue JS and Wordpress, I opted to try using Wordpress as a headless CMS and build the front-end with Vue’s Static Site Generator Nuxt.
Local Wordpress
The very first step is of course to spin up a Wordpress site locally so you can work on it. For this process I like to use local by flywheel. If you haven’t tried it I highly recommend you do, because the entire process is literally 3 clicks and 3 text input fields.
For this demo I’m assigning the site domain to headless and it will available at headless.local. Depending on what you use it may be localhost:####.
Headless theme
Once your Wordpress site is up and running, navigate to /wp-content/themes/ and create a new folder named headlesstheme (or whatever you’d like).
Inside of that folder create the following files:
functions.php
<?php

if (!defined('ABSPATH')) {
    exit;
} // Exit if accessed directly
style.css
/*
Theme Name: Headless Theme
Theme URI: https://github.com/username/reponame
Author: Your Name
Author URI: https://yoursite.com/
Description: headless theme for using WP as a REST API only
Version: 0.1.0
Requires at least: 4.7
Requires PHP: 5.6
License: GPLv2 or later
License URI: http://www.gnu.org/licenses/gpl-2.0.html
Text Domain: headlesstheme
*/
index.php
<script type="text/javascript">
  window.location = 'https://yourfrontend.com';
</script>
If you would prefer that visiting the url of this Wordpress site not redirect to your front-end app, leave the index.php blank.
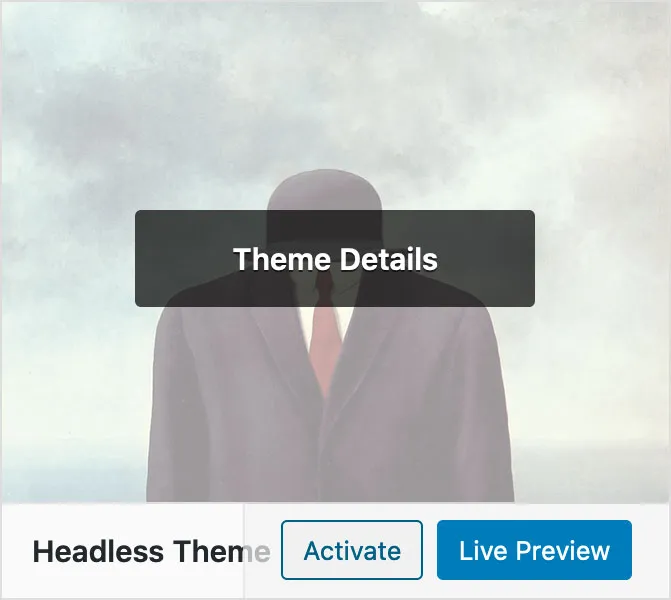
To make your theme look legit, add 1 more file to the new theme folder - an 800x600 PNG image file - and name it screenshot.png. This image is what will show up in the dashboard under Themes.
At this point you are ready to Activate your new theme.
3rd party plugins
Next, we need to install a few plugins to make using Wordpress as a CMS a little more convenient.
Classic Editor
Disables the new Gutenberg block editor.
Advanced Custom Fields
How this plugin is not part of core Wordpress at this point is beyond me, but as the name implies it adds the ability to add customized fields to posts, and pages. Without it, we would be limited to the default title, text content and feature image fields.
SVG Support
By default, the Wordpress Media Library doesn’t allow SVG images because, since they are XML based, they could potentially pose a security risk. Just make sure anyone you give editing privileges to is someone trustworthy and it shouldn’t be a problem.
If you prefer to avoid using a plugin, it is possible to enable SVG support just by add the following code to your functions.php file.
function allow_svg($mimes)
{
    $mimes['svg'] = 'image/svg+xml';
    $mimes['svgz'] = 'image/svg+xml';
    return $mimes;
}
add_filter('upload_mimes', 'allow_svg');

function fix_mime_type_svg($data = null, $file = null, $filename = null, $mimes = null)
{
    $ext = isset($data['ext']) ? $data['ext'] : '';
    if (strlen($ext) < 1) {
        $exploded=explode('.', $filename);
        $ext=strtolower(end($exploded));
    }
    if ($ext==='svg') {
        $data['type']='image/svg+xml' ;
        $data['ext']='svg' ;
    } elseif ($ext==='svgz') {
        $data['type']='image/svg+xml' ;
        $data['ext']='svgz' ;
    }
    return $data;
}
add_filter('wp_check_filetype_and_ext', 'fix_mime_type_svg', 75, 4);
I usually try to avoid using plugins and dependencies whenever possible, but in this case I found that by using this snippet the SVGs would upload and display nicely on the front-end, but would not display correctly in the Wordpress Dashboard, and getting them to do so consistently was more effort than it was worth. For this reason, I choose to use the SVG Support plugin.
JSON API
Out of the box, Wordpress gives you 2 default content types - posts and pages. And the Wordpress JSON API gives you endpoints to easily access both of these content types.
http://headless.local/wp-json/wp/v2/posts
and
http://headless.local/wp-json/wp/v2/pages
Adding ?page=1&per_page=100&_embed=1 will return all the available data.
Custom API plugin
Additional content types can be created and also queried using similar endpoints. The best place to put your code for creating these new post types is in a plugin.
To create a custom plugin, make a new folder inside /wp-content/plugins/ and name it headless-plugin (or whatever you’d like).
Inside that folder create a php file with the same name as your folder:
headless-plugin.php
<?php
/*
Plugin Name: Headless Plugin
Description: Custom setup for JSON API
Author: Your Name
Version: 0.1.0
Text Domain: headless-plugin
License: GPLv2 or later
License URI: http://www.gnu.org/licenses/old-licenses/gpl-2.0.html
*/
if (!defined('ABSPATH')) {
exit;
} // Exit if accessed directly
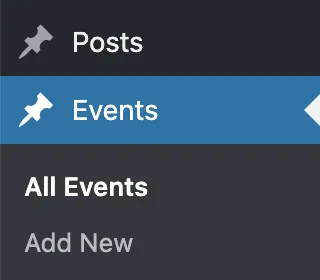
// ADD CODE FOR CUSTOM POST TYPES HEREThe following code will create a post type named Events:
// create events post type
add_action('init', 'create_post_type_events');
function create_post_type_events()
{
    $labels = array(
    'name'               => _x('Events', 'post type general name', 'headless-plugin'),
    'singular_name'      => _x('Event', 'post type singular name', 'headless-plugin'),
    'menu_name'          => _x('Events', 'admin menu', 'headless-plugin'),
    'name_admin_bar'     => _x('Event', 'add new on admin bar', 'headless-plugin'),
    'add_new'            => _x('Add New', 'Event', 'headless-plugin'),
    'add_new_item'       => __('Add New Event', 'headless-plugin'),
    'new_item'           => __('New Event', 'headless-plugin'),
    'edit_item'          => __('Edit Event', 'headless-plugin'),
    'view_item'          => __('View Event', 'headless-plugin'),
    'all_items'          => __('All Events', 'headless-plugin'),
    'search_items'       => __('Search Events', 'headless-plugin'),
    'parent_item_colon'  => __('Parent Events:', 'headless-plugin'),
    'not_found'          => __('No Events found.', 'headless-plugin'),
    'not_found_in_trash' => __('No Events found in Trash.', 'headless-plugin')
  );

    $args = array(
    'labels'             => $labels,
    'description'        => __('Description.', 'headless-plugin'),
    'public'             => true,
    'publicly_queryable' => true,
    'show_ui'            => true,
    'show_in_menu'       => true,
    'query_var'          => true,
    'rewrite'            => array('slug' => 'event'),
    'capability_type'    => 'post',
    'has_archive'        => true,
    'hierarchical'       => false,
    'menu_position'      => 5,
    'show_in_rest'       => true,
    'rest_base'          => 'events',
    'rest_controller_class' => 'WP_REST_Posts_Controller',
    'supports'           => array('title', 'editor', 'custom-fields'),
  );

    register_post_type('events', $args);
}
Make sure to use the same Text Domain that you specified in the comment at the top of this file.
Now we can query the Events using this endpoint http://headless.local/wp-json/wp/v2/events?page=1&per_page=100&_embed=1
It is also possible to create a custom endpoint for your new post types. The code below with create an events endpoint that can be accessed at http://headless.local/wp-json/mwdw/v1/events.
function events_endpoint($request_data)
{
    $args = array(
    'post_type' => 'events',
    'posts_per_page' => -1,
    'numberposts' => -1,
    'post_status' => 'publish',
  );
    $posts = get_posts($args);
    foreach ($posts as $key => $post) {
        $posts[$key]->acf = get_fields($post->ID);
    }
    return  $posts;
}
add_action('rest_api_init', function () {
    register_rest_route('mwdw/v1', '/events/', array(
    'methods' => 'GET',
    'callback' => 'events_endpoint'
  ));
});
Personally, I prefer to just work with the default endpoints.
ACF
Since we will be using Advanced Custom Fields to add content we need to add those fields to the data that is returned by the API. We can write a function to add the endpoints and then call that function on the rest_prepare_post_type hook for each post type using add_filter.
// add ACF object to default posts endpoint
add_filter('rest_prepare_post', 'acf_to_rest_api', 10, 3);
// adds ACF object to events endpoint
add_filter('rest_prepare_events', 'acf_to_rest_api', 10, 3);
function acf_to_rest_api($response, $post, $request)
{
    if (!function_exists('get_fields')) {
        return $response;
    }

    if (isset($post)) {
        $acf = get_fields($post->id);
        $response->data['acf'] = $acf;
    }
    return $response;
}
That’s pretty much it for setting up Wordpress. In part 2 we will query our data from Vue/Nuxt and setup auto deploys using Netlify.
Check out the source code for my theme and plugin. 👀
relaydesignco/mdmw-rest-plugin
relaydesignco/wp-headless-theme
Thanks for reading!